FitHive Updates - Dec 2020
Dec 10, 2020
by Joe H.
Let's take a look at what is new and how to use it.
Bulk Schedule Update
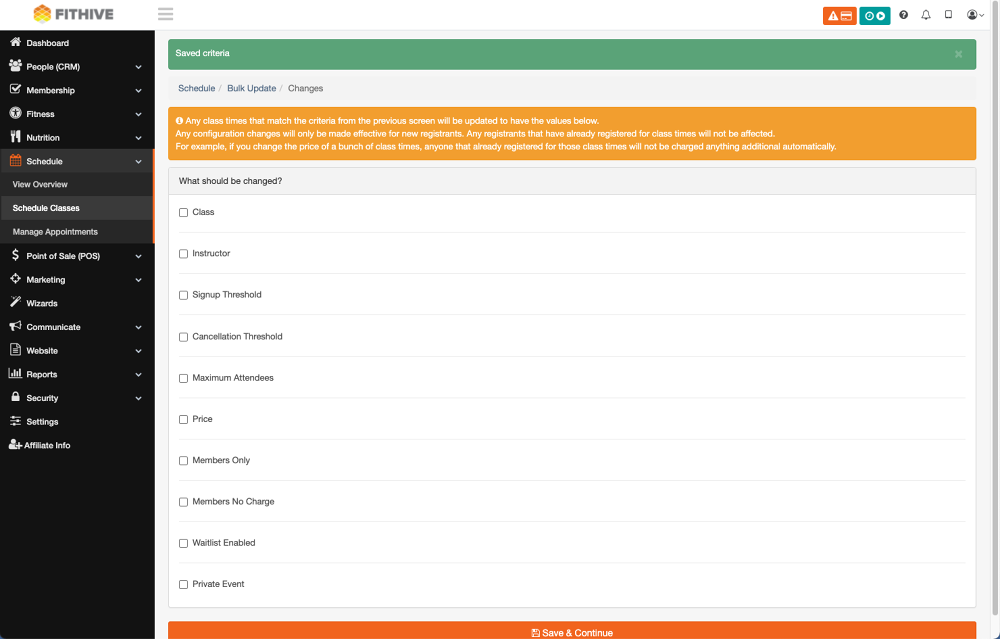
Prior to this update, you had to go into each class individually to make a change. You now can use the bulk update feature to make changes to all future classes at once. From you admin dashboard go to Schedule >> Schedule Classes >> Bulk Update >> Choose a Criteria/Search to Match Class Times option >> Choose What should be changed? (See screenshots below for bulk update capabilities)
You have 4 options to choose from for your search criteria to find which class(es) to update, Date Range, Time of day Range, Specific Class, Instructor
The next screen is where you choose what bulk change to happen. Choose from Class, Instructor, Signup Threshold, Cancellation Threshold, Maximum Attendees, Price, Members Only, Members No Charge, Waitlist Enabled, Private Event
This next screen will show you how many classes are going to be updated. You can also modify your search criteria or what is being changed from this screen prior to selecting Confirm Review / Proceed.
Select Yes, execute change when you're ready to make the bulk update.
Your bulk schedule update has now been completed. Each update you will Clear Current and Start New
Follow Up Leads Stat Bar
This update gives you a quick glance stat bar to know Total Leads, Past Due, Due Today & Due in Future. To access this go to People (CRM) >> Follow Up Leads. The stat bar will automatically update every 5 minutes or you can manually refresh at any time by clicking the blue refresh button at the top right.
As a refresher, you can update the lead status directly from your contact list or from a member's profile.
Drip Campaign Re-Add
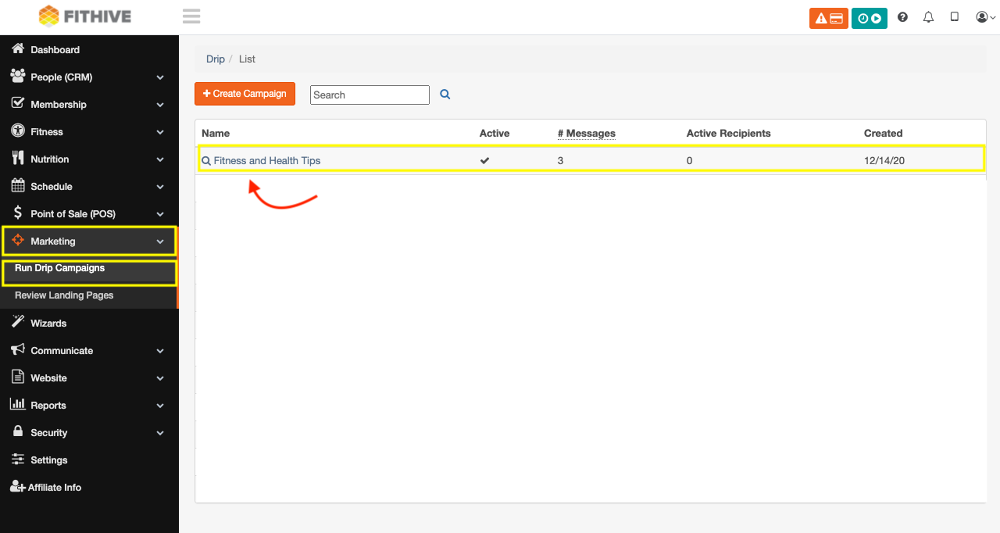
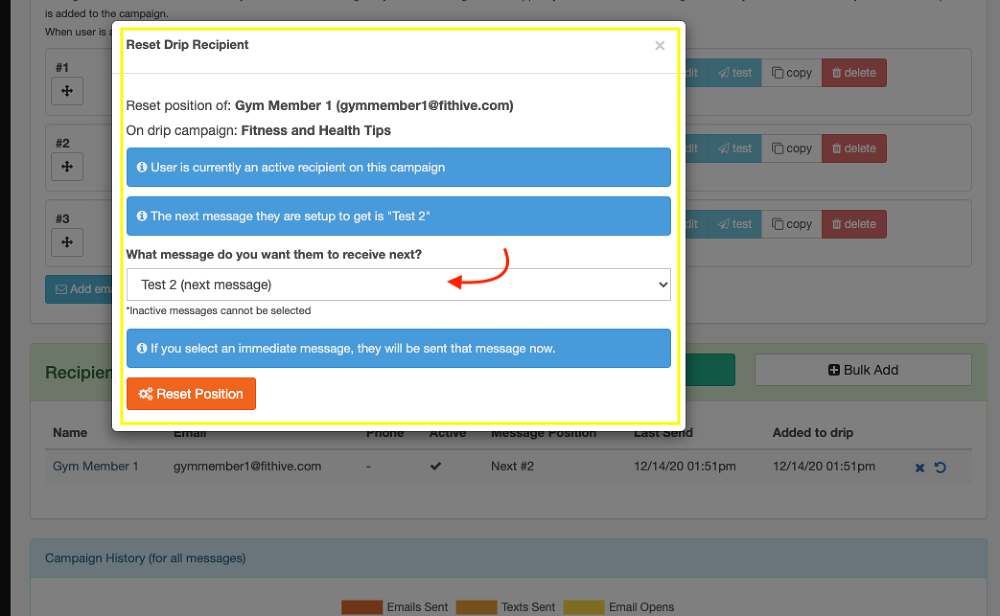
You can now re-add a user to a drip campaign as well as picking what stage in the drip they start at. From your admin dashboard go to Marketing >> Run Drip Campaign >> Select the Drip Campaign To Edit Recipient >> Find Recipient to edit >> Click Arrow To Reset Drip Recipient
Bulk Upload Multiple Tags
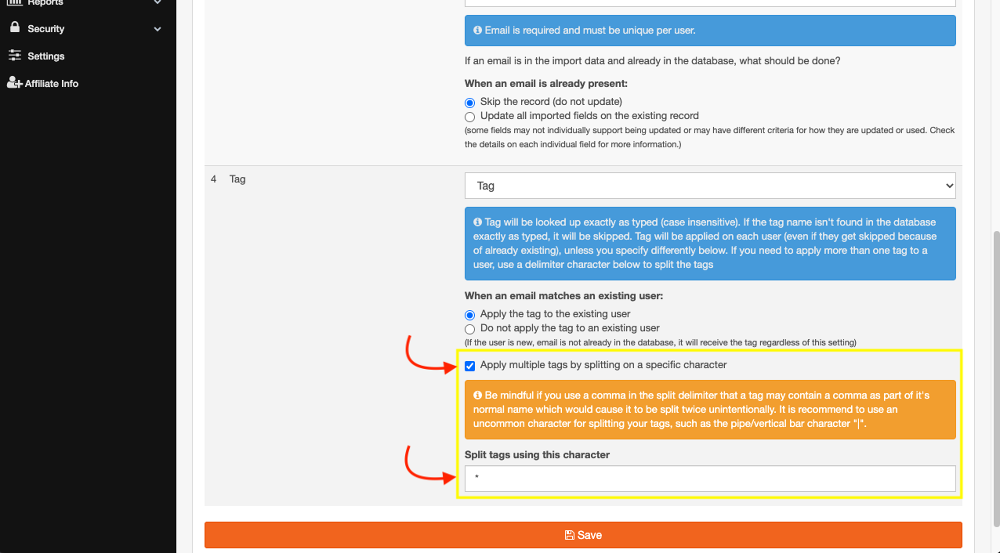
This update allows the ability to bulk upload a list of contacts and assign them multiple tags. From your admin dashboard go to People (CRM) >> View Everyone >> Batch Tools >> Import >> Follow Import Steps >> Check Apply multiple tags by splitting on a specific character >> Enter character into Split tags using this character
Note: On the contact list that you are uploading, you will choose what character will separate the tags. You can choose any character (ex. | , /, *, -) to enter on your list and then you will put the same character you chose on in the Split tags using this character box. Be mindful if you use a comma in the split delimiter that a tag may contain a comma as part of its normal name which would cause it to be split twice unintentionally. It is recommended to use an uncommon character for splitting your tags, such as the pipe/vertical bar character "|".
Mass Email Targeting
You can now select recipients to send a Mass Email to from another Mass Email. Choose All recipients from a specific message, Recipients who opened a specific message, or Recipients who did NOT open a specific message. From your admin dashboard go to Communicate >> Send Mass Emails >> Create Messages >> Select desired target audience From another Mass Email Message
As always, please feel free to reach out to success@myfithive.com with any questions you may have.
Thanks!
-The FitHive Team


